Requesting Certificates
This guide will run you through how to request and issue a new certificate for document signing using Cogito Group’s Jellyfish after your identity has been verified by your registration officer (usually Cogito Group staff).
How to:
1. Login to the Jellyfish Soft Certificate Portal
By now you should have activated your account and completed the identity verification process. Log into the Jellyfish portal by navigating to https://jellyfish.securesme.com/login and entering your username and password.

2. Request a Certificate
Once you have logged in, you will be greeted with the Certificate Manager Dashboard, allowing you to view any pending or approved Certificate Requests, request certificates, invite users, and more.
Click on the “Request Certificate” link on the left-hand side of the screen to request a new certificate, outlined in the red box below.

After navigating to the Request Certificate page, your priority is to ensure that you select the correct certificate lifespan. You can select one or two year certificates, with prices outlined in the pricing section of the Cogito Group website.
Click the dropdown and select the one or two year certificate profile as seen in the screenshot below.
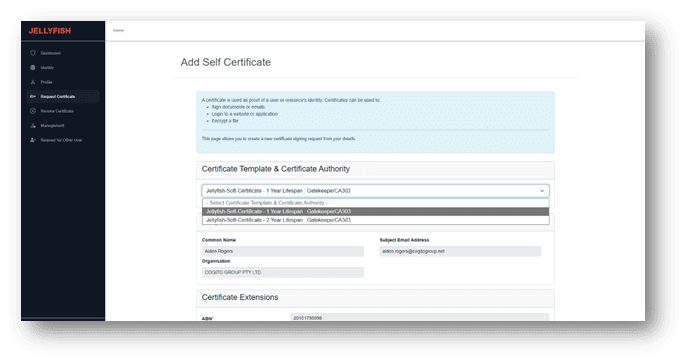
Once you have selected the intended certificate profile, ensure that all the details in the certificate request are correct. Once you have done that, we recommend giving the certificate a friendly name, which can be used to uniquely identify the certificate when you need to sign a document.
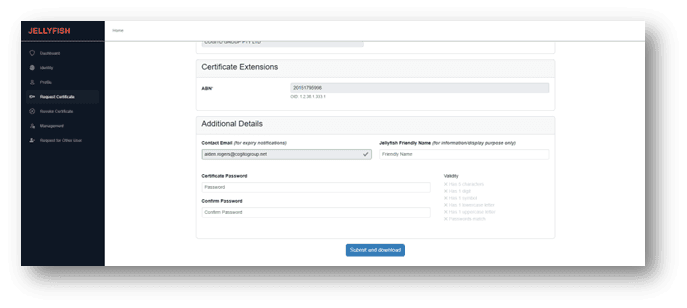
Click “Submit and download” and your certificate will be automatically downloaded.
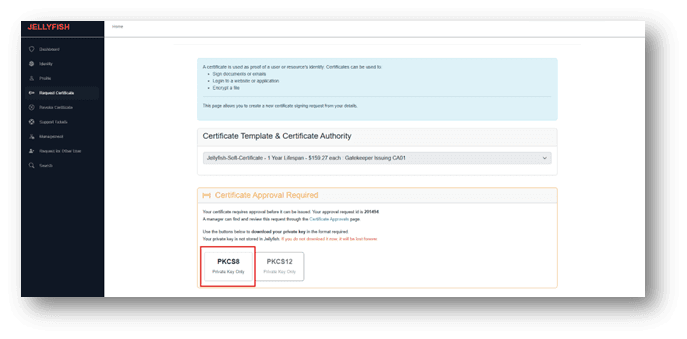
3. REQUIRED – Download your private key
Attention: If you do not download the private key at this point, it will be lost, and you will have to request a new one.
If you forget to download the private key DO NOT approve the request, you will be charged the full fee for the certificate.
Click PKCS8 (Private Key Only)
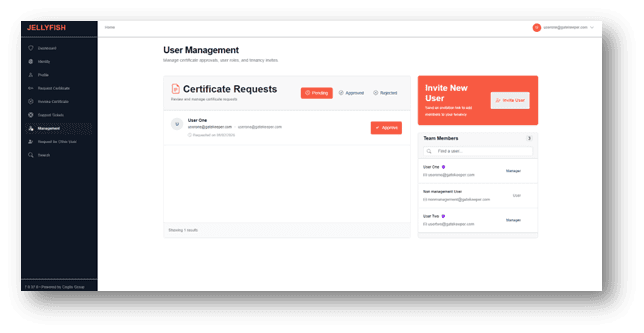
4. Approving the Certificate
Once the certificate request has been sent, all requests must be approved by a Certificate Manager. The Certificate Manager can find all certificate requests in the management dashboard. From here they can select the certificate request and either approve or deny the request.
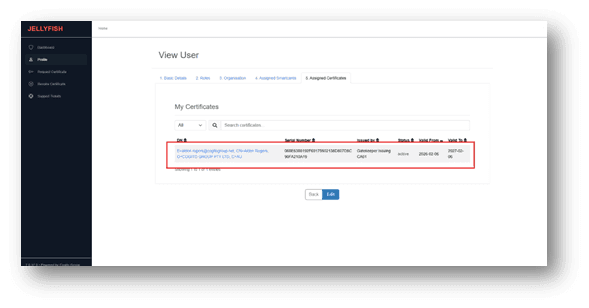
5. Collecting your Certificate
Once the request has been approved by at least one Certificate Manager, the user will receive an email indicating their certificate is ready for collection. They can find their certificate by navigating to their Profile > Assigned Certificates.
Click on your newly created certificate
Upload the private key that you downloaded in step 3 and enter a password (optional)
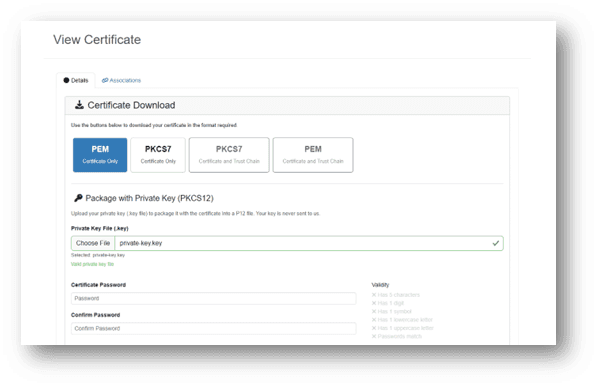
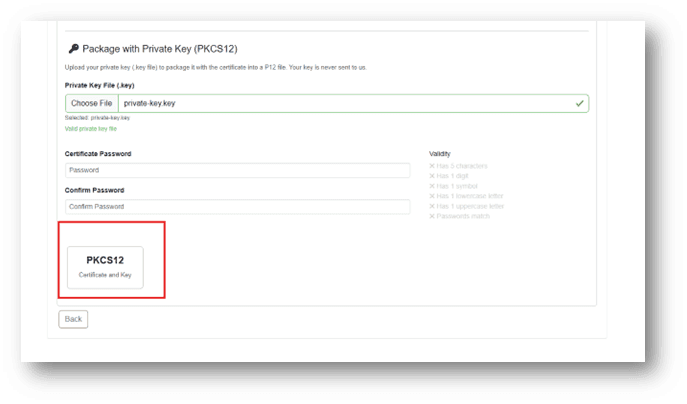
Scroll down and download your PKCS12 file.
6. Installing the Certificate
- Open File Explorer and go to your Downloads folder.
- Located the downloaded certificate file ending in “.p12”
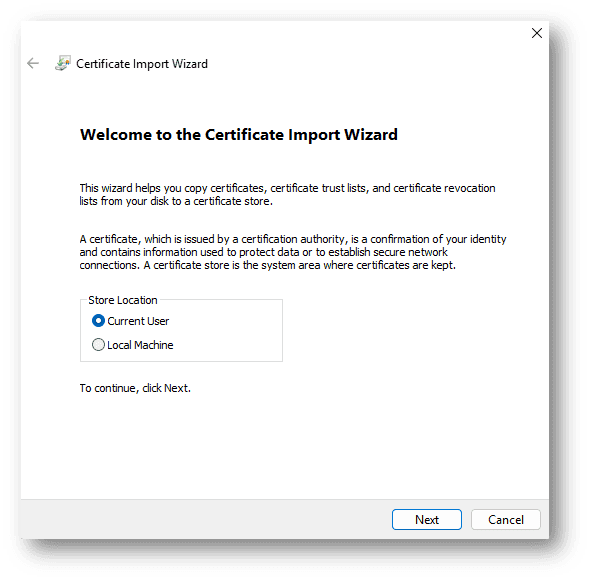
- Double click the file to launch the Certificate Import Wizard
- If prompted for Store Location, choose:
- Current User (recommended)
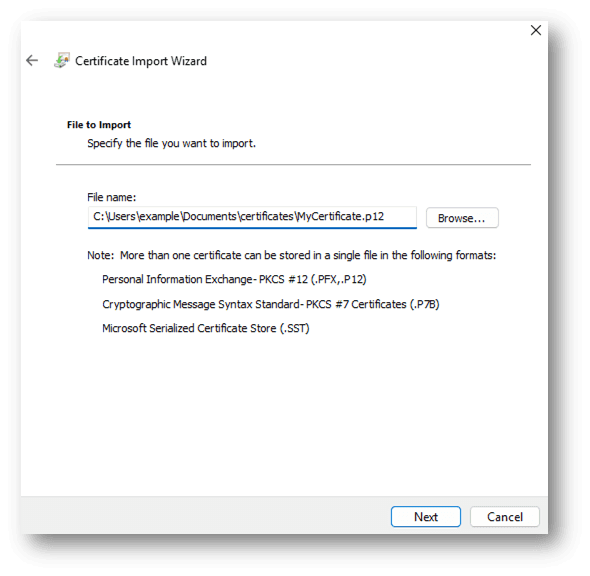
- On the File to Import screen, confirm the file path is correct, then click Next
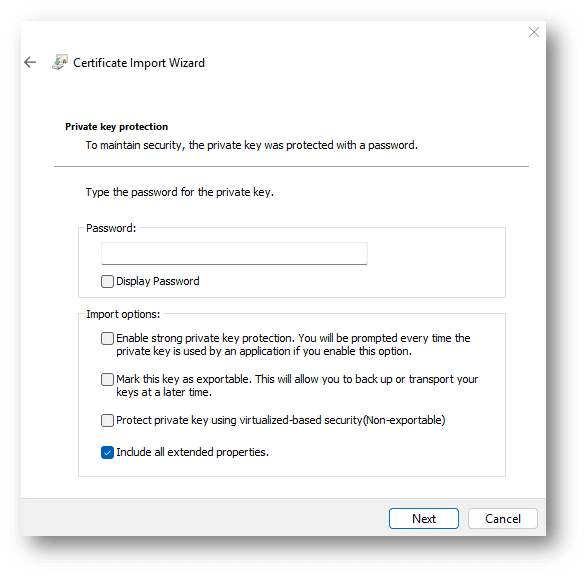
- On the Password screen:
- If you entered a password during certificate creation, enter the password.
- If you did not enter, leave the password field blank
- Leave all other options as their defaults
- Optionally, you can enable “Enable strong private key protection”.
- On the Certificate Store screen, choose one of the following:
- Automatically select the certificate store (recommended) or
- Place all certificates in the following store.
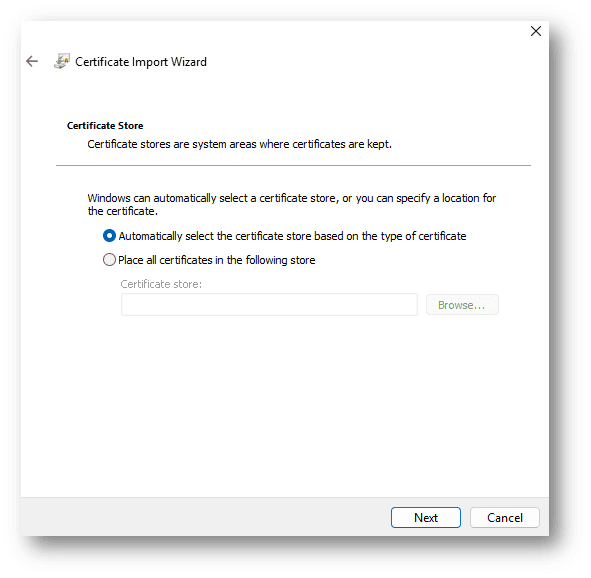
- Click next -> finish
- You should see: “The import was successful”